

Table of Contents
Intro
This is the second out of a series of articles where I’m presenting a sample NodeJS project and deploying it to a Kubernetes cluster using Amazon Elastic Kubernetes Service (EKS).
I completed this project as part of the Cloud Developer Nanodegree at Udacity. You can find the source code on GitHub.
In Part 1, we went through the following topics:
- Present the overall functionality and business rules
- The System Architecture
- PostgreSQL set up with Amazon RDS
- S3 storage for images
- Users registration and login process – hashing and generating JWT tokens
- Dockerizing all the components
- Run everything locally with Docker & docker-compose
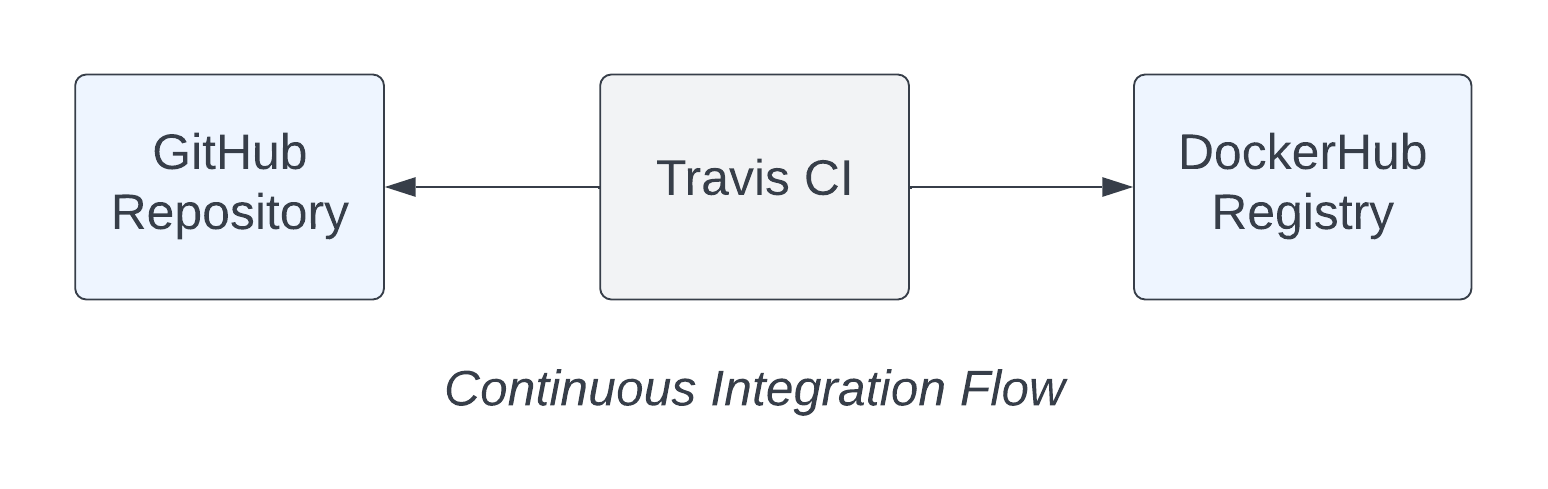
In this post, we’ll set up Continuous Integration using Travis CI.
As a final result, we’ll have our docker images pushed to DockerHub. In the next article, we’ll use these images to deploy the system to Kubernetes.
About the Nanodegree
The Nanodegree will train you in critical AWS skills to become an effective cloud developer.
Some of the covered topics are:
- Cloud Computing in AWS
- Storage & Content Delivery
- Cloud Security
- Networking & Elasticity
- Deployments via AWS Elastic Beanstalk
- Microservices Design Principles
- Messaging & Containers, Docker
- Containers orchestration with Kubernetes in AWS
- Serverless apps, Lambda functions, Auth
Each of the main sections ends with a small project where you can interactively put your knowledge into action.
Also, you’ll get to complete a final Capstone project putting together most of the concepts you go through during the learning journey.
Don’t let the pricing discourage you – at the time I took the Nanodegree, every customer could use a discount coupon that reduces the cost by up to 90%!
Continuous Integration with Travis CI
Travis CI lets us easily build a Continuous Integration pipeline. It’s very straightforward to get started and integrate your system in a few minutes. There is also a free version that’s a perfect fit for demo projects like this one.
Travis uses a YAML file that you should create and put in your root directory. From there on, Travis will recognize your configuration and execute the steps you specified.
For this demo, I’ll connect Travis CI to my project on GitHub and configure it to build and publish Docker images in my DockerHub registry. Travis will use the same Docker build artifacts I presented in the previous article.
Let’s walk through the required steps to build our CI pipeline.
Create Dockerhub Repositories
Make sure to create the following repositories in your DockerHub registry:
udagram-reverseproxyudagram-frontendudagram-api-feedudagram-api-user

The names here should match the ones configured in the docker-compose-build.yaml file:

Register and Connect your GitHub Repo
To create your Travis CI account, go to https://travis-ci.com/.
It’s recommended to sign up with your GitHub account:

Then you need to allow access to your repo.
To do that, go to your account settings:

And hit the Activate button:

You’ll get redirected to GitHub to select the repos you’d allow Travis to access:

The next step is to prepare the environment variables.
Configure Environment Variables
If you remember from the previous post, we need our DockerHub credentials to push the images to the registry. They are used in the docker-push.sh file:

To configure these in Travis, you need to go and add them to your repo settings page:


Prepare Your Travis Config YAML File
Take a look at the Travis YAML file in the root directory of the GitHub repo.
language: minimal

services:
  - Docker

script:
  - docker --version
  - docker-compose -f docker-compose-build.yaml build

deploy:
  provider: script
  script: bash docker-push.sh
  on:
    branch: main
The configuration, in our case, is pretty simple. In essence, we instruct Travis to build our images using the command:
docker-compose -f docker-compose-build.yaml build
And then push these images to DockerHub using the docker-push.sh script.
Your First Build
Once you push your changes to GitHub, Travis will automatically trigger a new build. You can also start a build manually if you want to.
If everything is successful, you should see a similar output in your Travis Dashboard:

You can click on the build and review the logs, which is especially useful if the build has failed.

Finally, you can go to DockerHub and make sure your images have been created and pushed to the registry:

Summary
In this article, you explored how to set up Continuous Integration for our demo project using Travis CI.
Next, we’ll put everything together and deploy the whole system to Kubernetes using AWS EKS.
Thanks for reading, and see you next time!


