

Table of Contents
Intro
In this article, we’ll continue where we left off and see how to properly handle the networking issues we had last time.
Concretely, we need to find a way to host our Fargate Task in a private subnet (so it’s not reachable publicly) but also allow for outbound internet traffic through a static public IP address.
We will whitelist this IP in Atlas, making the Mongo cluster accessible from the running container.
Set Up a NAT Gateway for a Private Subnet in Amazon VPC
This section will be a step-by-step guide where you’ll create all the required networking components.
These steps are similarly listed here, but I’ll also provide a walkthrough guide with screenshots and further explanations for our specific use case.
Let’s get going!
Create a VPC
Go to the VPC dashboard and start creating a new VPC.

Note that here we’re selecting the “VPC only” option, thus creating only the VPC without any additional artifacts. That’s because I want to go through manually building all the needed additional resources. This way, it will become very apparent what components are required and for what purpose.
If we select the “VPC and more” option, we can short-circuit these manual steps. It will walk us through a wizard to automatically create the supplementary components – subnets, routing tables, NAT gateway, etc. You’ll see more about it at the end of the article.
Create Subnets
Now we’ll create two subnets – a public and a private one. Strictly speaking, a subnet is not explicitly marked as public or private in any particular way. The convention is that we call a subnet public if it has a record in its routing table pointing to an Internet Gateway.
We’ll see how this is done but let’s first create the subnets.
Go to the subnets section and create the first one. We’ll later designate it as “public”:

Now, create the “private” subnet:

Create and Attach an Internet Gateway
Create a new Internet Gateway:

Then attach it to the VPC:

Create a Route Table for the Public Subnet and Add a Route to the Internet Gateway
Go to the Route tables section and create a new route table:

Then, add a record to the route table – the Destination is 0.0.0.0/0, representing all IPv4 addresses. The target is the Internet Gateway attached to the VPC.

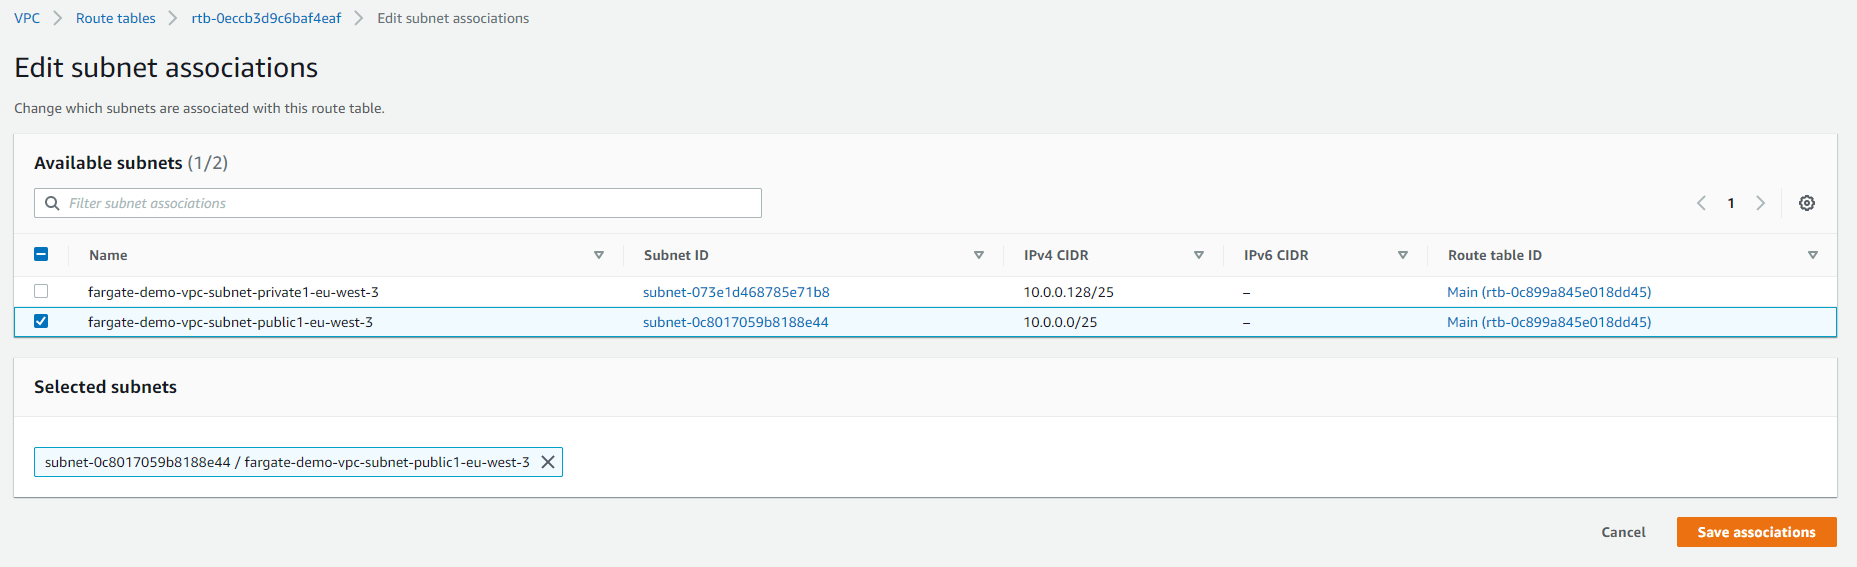
Lastly, attach the route table to the public subnet:
Create a NAT Gateway
It’s time to create the NAT gateway. You need to specify a name, the public subnet in which to create it, and the Elastic IP address (you can use an existing one or allocate a new one).

Once the NAT Gateway is built, you can check the public IP address:

At this point, you can go ahead and whitelist the IP in Atlas as described in the previous post.
Set Up the Route Table of the Private Subnet to Point Traffic to the NAT Gateway
Let’s create a new route table for the private subnet. That’s not mandatory, as we can use the default route table, but I think it’s a cleaner approach.

Then, attach it to the private subnet:

Finally, make sure you add a record to route the internet traffic through your NAT Gateway.

Configure the ECS Task to Run on Scheduled Intervals
Now that we have the networking part covered let’s create a scheduled Fargate Task and ensure it runs successfully.
Go to the ECS Cluster, click the Scheduled Tasks tab, and hit Create:


The cron expression specifies that the task will run daily at 8 am (UTC).
Complete the rest of the required fields:


Pay attention that here we’re selecting the private subnet. So the task can access the internet through the NAT Gateway, but at the same time, it’s not reachable from the “outside world.” Your new task should appear in the Scheduled Tasks list:

Task Run
Once the task runs, you should be able to find the logs in Cloud Watch. This time everything should be successful, and you will see the expected result in the logs:

Create Everything Automatically via the “VPC and more” Option
Now that we have everything up and running, I just wanted to mention that there’s a more direct way to create all the required networking resources.
The reason I didn’t propose this approach from the beginning is because it comes with a pinch of magic for the inexperienced user. It’s a little hard to follow and understand exactly what type of resources are built and what’s their role.
However, after we went through the step-by-step process, you should be able to understand what components are created behind the scenes via this automated procedure.
You can select “VPC and more” in the VPC creation screen. This will allow you just to tick all the components you need:


After clicking “Create VPC,” all the required resources will be created in one go.
Summary
In this article, we explored how to host our Fargate Task in a private subnet but still enable it for outbound internet traffic via a NAT Gateway.
I hope this was helpful. See you next time!


