

Table of Contents
Intro
In the previous post, you familiarized yourself with the topic of Kafka Listeners and the high-level networking workflow when connecting to a Kafka broker running in Docker on your host machine.
In this article, I’ll dive deeper into the network communication between the client and the Kafka cluster. Thanks to Wireshark, which supports the Kafka protocol, we can easily capture the details of the networking calls to understand the whole process better.
Concretely, here’s a list of what we’ll go through:
- Spin up a two-broker Kafka cluster in Docker.
- Run a simple C# client app that creates a topic with two partitions and produces/consumes messages to/from each of them.
- Explore the Kafka protocol:
- Get brokers metadata
- Create a topic
- Get metadata (partitioning info) for a specific topic
- Producing messages to different partitions
- Interacting with the Kafka Coordinator
- Joining a Consumer Group
- Fetching data (consuming messages)
- Handling offsets
Multi-Broker Docker Setup – Dockerfile
Here’s a sample Dockerfile you can use directly to start a two-broker Kafka cluster locally in Docker.
---
version: '3.8'
services:
  zookeeper-1:
    image: confluentinc/cp-zookeeper:5.5.1
    ports:
      - '32181:32181'
    environment:
      ZOOKEEPER_CLIENT_PORT: 32181
      ZOOKEEPER_TICK_TIME: 2000


  kafka-1:
    image: confluentinc/cp-kafka:5.5.1
    ports:
      - '9092:9092'
    depends_on:
      - zookeeper-1
    environment:
      KAFKA_BROKER_ID: 1
      KAFKA_ZOOKEEPER_CONNECT: zookeeper-1:32181
      KAFKA_LISTENER_SECURITY_PROTOCOL_MAP: INTERNAL:PLAINTEXT,EXTERNAL:PLAINTEXT
      KAFKA_INTER_BROKER_LISTENER_NAME: INTERNAL
      KAFKA_ADVERTISED_LISTENERS: INTERNAL://kafka-1:29092,EXTERNAL://localhost:9092
      KAFKA_DEFAULT_REPLICATION_FACTOR: 2
      KAFKA_NUM_PARTITIONS: 2
      KAFKA_OFFSETS_TOPIC_REPLICATION_FACTOR: 2


  kafka-2:
    image: confluentinc/cp-kafka:5.5.1
    ports:
      - '9093:9093'
    depends_on:
      - zookeeper-1
    environment:
      KAFKA_BROKER_ID: 2
      KAFKA_ZOOKEEPER_CONNECT: zookeeper-1:32181
      KAFKA_LISTENER_SECURITY_PROTOCOL_MAP: INTERNAL:PLAINTEXT,EXTERNAL:PLAINTEXT
      KAFKA_INTER_BROKER_LISTENER_NAME: INTERNAL
      KAFKA_ADVERTISED_LISTENERS: INTERNAL://kafka-2:29093,EXTERNAL://localhost:9093
      KAFKA_DEFAULT_REPLICATION_FACTOR: 2
      KAFKA_NUM_PARTITIONS: 2
      KAFKA_OFFSETS_TOPIC_REPLICATION_FACTOR: 2
C# Demo App
I will provide a quick overview of the sample C# client, but I hope it’s straightforward enough for everyone to comprehend, even if you are unfamiliar with the language.
The C# client library is based on librdkafka like the other most popular Kafka clients (Java, C/C++, Python, Go), so all the details should also apply to them.
I’ll execute this program and meanwhile capture the networking calls via Wireshark.
Take a moment to review the source code:
To run this locally, you need to install the Confluent.Kafka NuGet package. I am currently using version 1.9.2.
Now, let me briefly describe the implementation.
First, we create a Kafka topic with two partitions. This is a simple enough yet a valuable setup to trace the multi-broker communication.
Then, two messages are produced – one per partition. Note that I am not using a partitioning key here but specifying the partitions explicitly when producing the message:

The reason is that the partitioning algorithms in Kafka are out of scope for this article, and I preferred not to derail from the main topics.
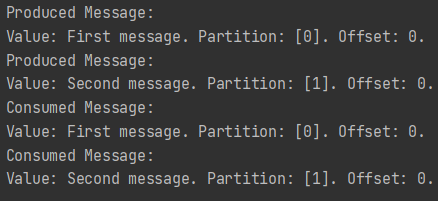
The produced messages are printed to the console.
After that, I configure a new consumer and start reading messages in a loop:

About “EnablePartitionEof”
Note the trickery around the EnablePartitionEof config option. This is something I’m using for demo purposes. The main goal is to stop the consumer and exit the program once all the messages from all partitions are processed. With this setting enabled, Kafka will emit a special EOF message when a consumer reaches the end of a partition.
In a real-world scenario, this is not applicable in most cases because the producers might continue emitting messages at any time. Still, for testing purposes, it helps by providing some determinism for exiting your app.
The consumed messages are printed to the console as well.
Here’s the output of this program:
Workflow
Below is a sequence diagram that illustrates conceptually the Kafka API calls we’re about to explore:

Wireshark Setup
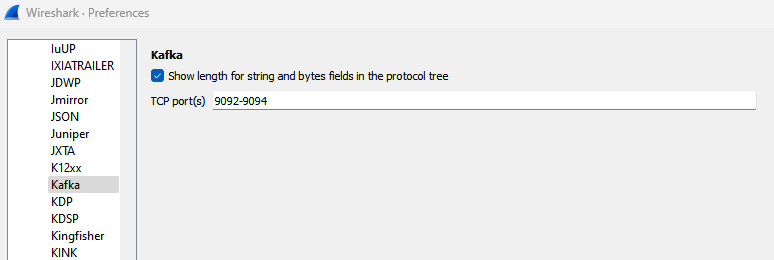
Luckily Wireshark supports the Kafka protocol, which means it decodes the raw TCP messages and presents them in a human-readable format.
Still, you need to make sure the protocol is enabled in Wireshark by going to Edit -> Preferences, select Kafka under Protocols, and specify the required ports:
Wireshark Capture
In this section, we’ll review the Kafka networking API calls captured via Wireshark.
Be aware that I am not going to list every single request, as some of them would not really help us with our overall understanding and might just add some unnecessary cognitive overload.
Another point I’d like to make is that most of the interactions on the consuming side require two identical API calls – one for each partition. For example, getting the offset for a partition, fetching messages, committing the latest offset, etc. I’ll present most of such requests only for one of the partitions and omit the other to keep things simple.
Get Brokers Metadata
The first “metadata” call is mostly about discovering the available brokers in the cluster. In other words, that’s the “bootstrap call” as described in the previous article.
The request is triggered at the very first interaction with the cluster when building the admin client:

Request:

In this case, the metadata call was sent on port 9092, which is the first server from the bootstrap config:

If this broker happens to be unreachable, the request will be sent to one of the others (localhost:9093 in our scenario).
Response:

You can see the metadata response contains the two brokers listed with the URIs they can be reached on – localhost:9092 and localhost:9093
Create Topic
Next is the topic creation:

Request:

Response:

Get Metadata for the Topic
The next step is to produce a message:

The producer must know which broker is the leader for the partition for each message. To get that information, another metadata call is sent, but this time it specifies the topic name.
Request:

Response:

The response signifies that the leader for Partition 0 is Broker with ID 2, which is accessible at localhost:9093
Respectively, the leader for Partition 1 is Broker with ID 1 at localhost:9092
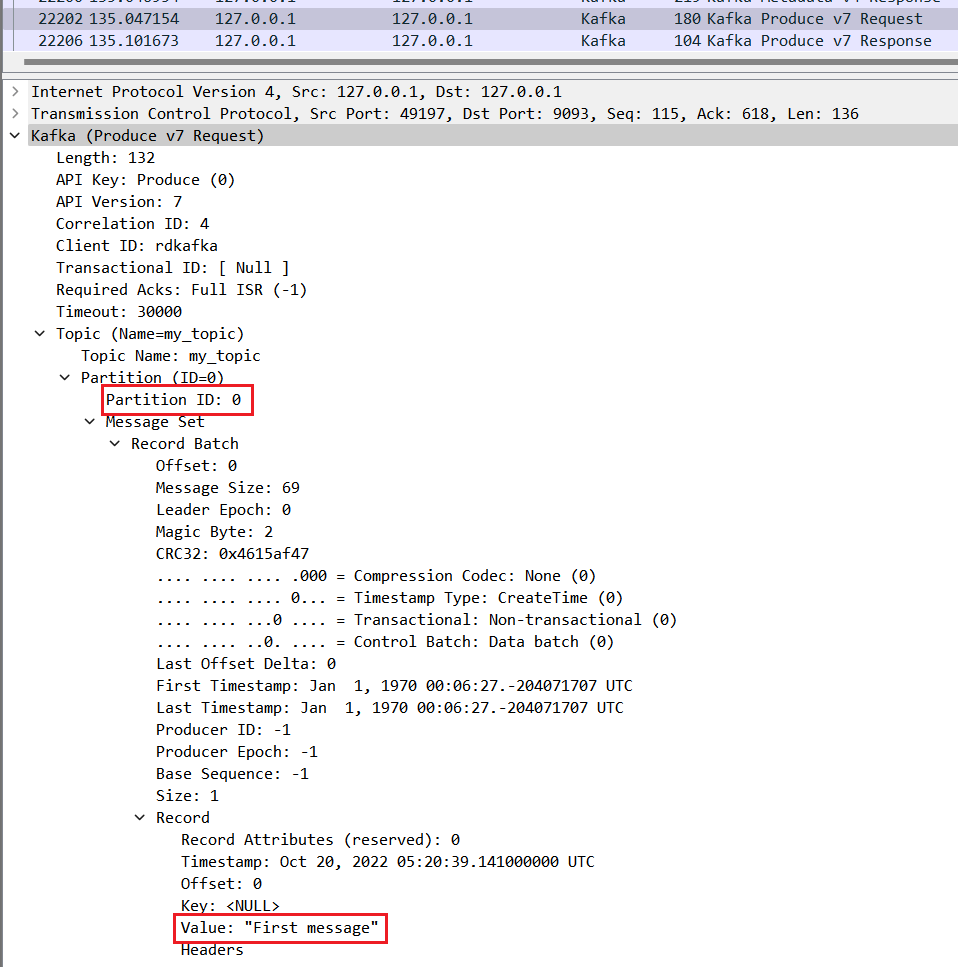
Produce
Once the leaders for the partitions are known, the Kafka client sends a Produce request for the two messages we’re sending – the first message is sent to the leader broker for Partition 0 (localhost:9093), and the second one goes to localhost:9092 for Partition 1.
Request – Partition 0
Response – Partition 0

Request – Partition 1

Response – Partition 1

Find Coordinator
Next, we build the Kafka consumer:

When this code runs, the Kafka client sends a FindCoordinator request to the cluster.
Without delving into the details, the Coordinator is one of the brokers that keeps track of the consumers in a consumer group. It receives heartbeat messages from the consumers, and when a consumer leaves or joins the group, the Coordinator might initiate a rebalancing for the partitions.
Request:

Response:

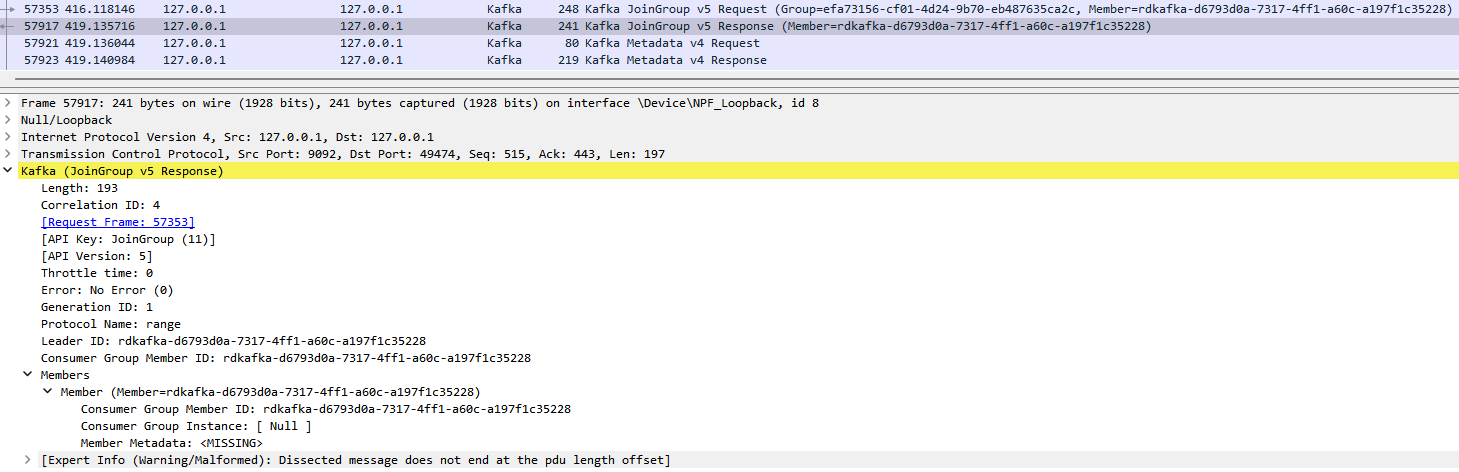
Join Group
Then, a Join Group request is sent to the Coordinator for registering a new consumer.
Request:

Response:
Getting the Offsets for Each Partition
The next step is to subscribe to the topic:

After executing this code, the Kafka client starts fetching messages in a loop. Note that I’m not referring to the while loop in the source code. When invoking the consumer.Subscribe(), the client library starts polling messages for every partition on background threads.
Before starting this continuous fetching, the client needs to get some information regarding the offsets. For example, it needs to know the latest committed offset for every partition so it would fetch only the newer messages.
There are two API calls to get the job done – OffsetFetch and Offset.
OffsetFetch Request:

OffsetFetch Response:

Offsets Request:

Offsets Response:

Note that this Offset call is only for Partition 0. The one for Partition 1 is similar, so I’ve omitted it.
Fetching Data
Once the starting offsets are clear, the Kafka client starts polling for messages in the background via Fetch API calls.
Below is an example for Partition 0 starting at offset 0:
Fetch Request – Partition 0, Offset 0:

Fetch Response – Partition 0, Offset 0:

Once the message at offset 0 is retrieved, the next Fetch starts at offset 1.
Fetch Request – Partition 0, Offset 1:

Fetch Response – Partition 0, Offset 1:

There are no more messages, so this Fetch returns an empty response.
Commit Offset
At some point, the client needs to persist the latest read offset.
This happens via the OffsetCommit API.
Here is the sample for Partition 0:
Request – Partition 0:

Response – Partition 0:

Leave Group
The LeaveGroup API is invoked when closing the consumer:

Request:

Response:

Summary
In this post, we gained a better understanding of the Kafka networking protocol by tracing the API calls via Wireshark.
Thanks for reading, and see you next time!


